
Bravely Default 2, a game about grinding, finding crystals, and saving the world (but not about climate change), is out now for Nintendo Switch. And it’s no cakewalk. Yes, Bravely Default 2 is a whole lot of game, with a complex network of interweaving systems and methodical, relentless battles that will mess you up if you’re not properly prepared. Here’s how to make the most of it.
It’s not a sequel.
You don’t need to familiarize yourself with any characters or plot points from previous games, nor will you have to dust off some byzantine lore guide and read up on in-game religions or geopolitical paradigms. This is a new entry in an old series with similar themes, graphics, and battle systems, kind of like how each numbered Final Fantasy isn’t directly related to the other Final Fantasy games.
Okay, now that you’ve exhaled a sigh of relief...
Mess around with the settings.
There are a handful of changes that, trust me, will make your life way easier. First, set the walk speed to “run.” You’ll spend a lot of Bravely Default 2 walking through dungeons, forests, castles, ruins, and one very infuriating ice cave. You might as well do so at a brisk pace. By default, you have to hold down “B” to run. Switching this setting makes you automatically move at running speed. (Holding down the B button then slows your roll to a walk.) It’s the first change I made, and I haven’t looked back once.
You can also speed up cutscenes by making sure the dialogue automatically advances and by switching the text speed to “fast.” While you’re at it, disable the controls during cutscenes. You’ll still be able to use them—“L” toggles the auto-advance for dialogue off or on, “R” skips the scene altogether—but the prompts won’t clutter your screen. Bravely Default 2 features a whole lot of cutscenes, and these three settings make the process go by just a bit faster. And as with any game of this nature, you can always tap “A” to skip individual lines. Keep that in mind when the game’s most irritating character (you’ll know him when you meet him) shows up.
Series fans will be happy to know that you can tweak the controls so that hitting “L” will automatically Default in battle.
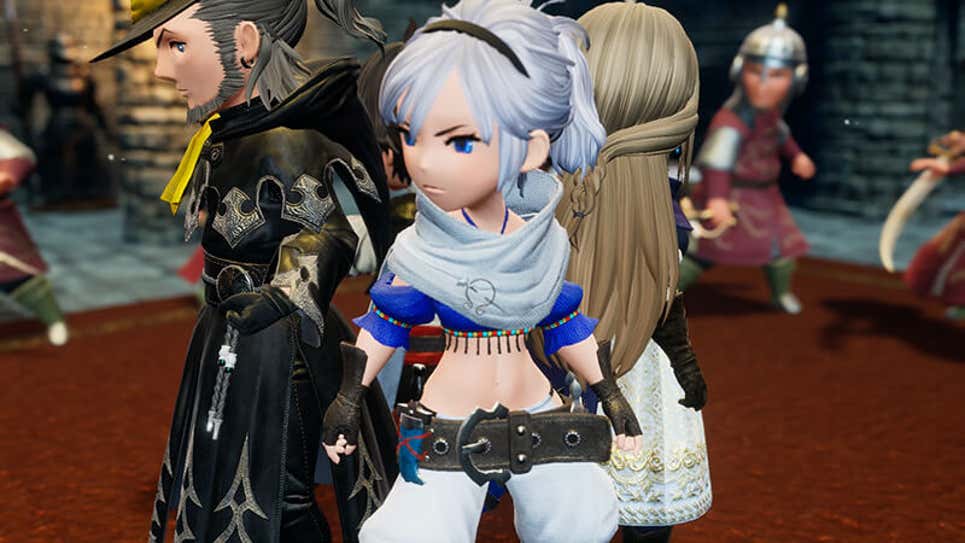
Finally, know that you can turn job-specific outfits off. Here’s what a scene looks like with them:
Screenshot: Square Enix / Kotaku
Here’s that same scene without them:
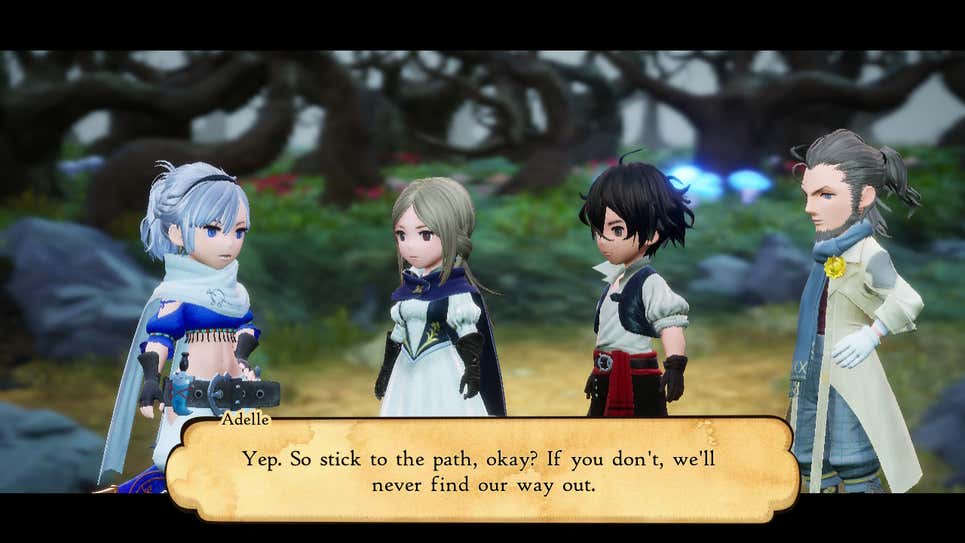
Screenshot: Square Enix / Kotaku
Job-specific outfits can serve as an easy visual cue that immediately indicates which jobs you’ve assigned to which characters. But also...yeah…
Give the right people the right jobs.
Yes, Bravely Default 2 operates on a job system, not unlike the one that courses through Final Fantasy XII: The Zodiac Age. Each character can wield two at once—a main job and a sub-job—which will dictate their stats, moves, and best-suited equipment, plus what clothing they wear (see above). Success is wholly contingent on knowing how to master this system.
For a thorough look at how to make the most of Bravely’s job system, plus some suggestions for powerhouse builds, check out our deep dive:
For those who just want some basic advice, here’s the 101-level rundown:
In general, Elvis and Gloria are better suited for magic-based jobs (ex: Black Mage, Red Mage, White Mage), while Seth and Adelle tend to take to jobs designed for whacking (ex: Monk, Berserker, Vanguard). Jobs that elude simple categorization (ex: Beastmaster, Dragoon, Freelancer) work with pretty much any character.
Don’t fall into the trap of thinking jobs are permanent assignments. You’ll fare better by treating them as you would equipment, swapping things around however a particular situation calls for it.
You should strive for balance. At any given point, you should have one healer, one mage, and one bruiser on your team. Enemies have a wide variety of different weaknesses. You’ll want to be prepared for whatever the game throws at you.
Each job has twelve levels. Every level grants a new ability. Gray abilities are active abilities, and you need to equip the job they’re affiliated with, as either a main or a sub, to use them. Green abilities are passive abilities. Once you’ve unlocked a passive ability, you can equip it regardless of whether or not you have that job equipped.
Each job has two perks (or “specialties,” to use the in-game parlance). The first perk is usually helpful. The second, meanwhile, is often game-changing, though it won’t unlock until you’ve fully leveled up that job. For instance, a fully leveled Red Mage will cast spells twice with no extra cost to MP. Meanwhile, a Black Mage won’t ever have their spells absorbed.
Sub-jobs are just as important as main jobs. A character’s main job will dictate their stats, but they’ll still have access to any unlocked active abilities affiliated with an equipped sub-job.
However many jobs you think you’ll find in this game, double your expectations.
Now double them again.
Any job points you earn will only go toward leveling up an equipped main job.
Immediately level up the Freelancer job for everyone.
The single best piece of advice I can impart is this: Max out the Freelancer job for all of your party members as soon as you can. At level nine, you’ll unlock the JP Up ability, which increases the number of job points you earn by 20 percent. At level 12, you’ll get the JP Up and Up ability, which increases earned job points by 50 percent. Equipping both abilities will give you a 70 percent boost to any earned job points, meaning you’ll absolutely rip through leveling up new jobs.
Beyond that, a fully leveled-up Freelancer can get a serious stat boost. The job’s second perk more or less boosts your stats across the board, contingent on how many other jobs you’ve fully mastered with that character. As Seth, for instance, I’ve mastered six jobs. Look what happens to his stats when I set his main job as Freelancer:
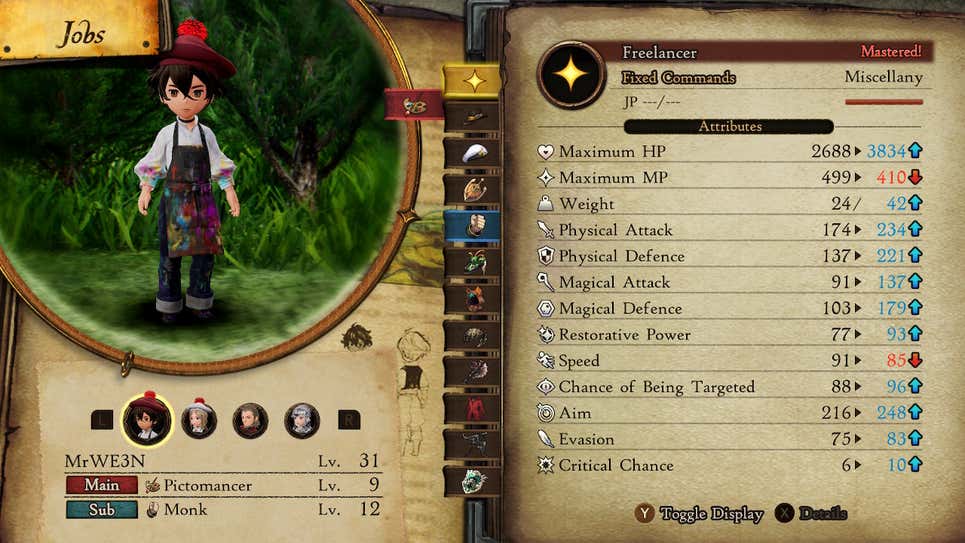
Screenshot: Square Enix / Kotaku
Those who work in media already know this, but, just to reiterate: Freelancers kick ass.
There’s a strategy in leveling up jobs just to unlock passive abilities.
In Bravely Default 2, you’re limited in how many passive abilities you can allot for each character. Some abilities cost one point while others cost two. You have five points to work with per character. And, confusingly, sometimes the best abilities come from jobs you’d never assign as a main or a sub for a particular character.
For example, you might not think a Beastmaster main job pairs well with a Black Mage sub-job—and, sure, the two go together like red wine and tuna salad. But getting someone’s Beastmaster job to level 10 will unlock the MP Saver ability, which reduces MP consumption by 20 percent. When you’re in the late-game, spells can easily cost 60 MP or more. Thus, it’s well worth taking your magic users off mage duties for a minute to level up their Beastmaster job. Once you’ve unlocked and assigned MP Saver, you can forget the Beastmaster job forever.
You can probably take out cannon fodder in one move.
Combat in Bravely Default 2 is based on the series’ rewarding Brave/Default battle system. (Yes, yes, that’s the name of the game. Move along.) At the core is a standard turn-based attack-attack-defend-defend system. But you can also decide to Brave or Default.
Initiating Brave allows you to borrow against future turns, whereby you can unleash a flurry of moves that will then leave you open to attacks. You can use Brave up to three times in a row, allowing for four consecutive moves. Or you can Default, going into a defensive state and storing that turn for future use. The amount of turns you have in stock is identified by battle points, or BP.
Here are some ground rules:
- Every fighter starts a battle with a baseline of zero BP, no matter the deficit you wracked up the prior battle.
- A fighter with negative BP won’t be able to borrow against future turns, kind of like how banks won’t let you take out a loan if, say, you’ve racked up an exorbitant amount of credit card debt on sporadic SoHo shopping sprees.
- You can’t have less than negative-three BP.
- Though you typically can’t bank more than three BP, you can keep defaulting. You just won’t bank any extra turns.
- Defaulting reduces damage by about half, but maybe more, but maybe less? Half is a good estimate.
- Critical hits and elemental weaknesses increase damage by about half, but maybe more, but maybe less? Half is a good estimate.
- Look: Much of how this battle system flows is rooted in guesswork. In the opening tutorials, you’ll even see the game fully admit that all this stuff just kinda happens, man. The main thing to note is that, when the yellow bar below one of your characters is about to fill up, their turn will happen soon. When a monster has two exclamation points over its head, that means it’s about to attack. Just don’t expect to find a specific turn order.
In short, the battle system of Bravely Default 2 is as temperamental as it is predictable, so it might seem counterintuitive when I say you should take risks often, at least with the cannon fodder. Rank-and-file enemies generally don’t have much health. You can probably wipe out an entire squad (you’ll never face more than six foes at once) by Braving thrice and attacking as much as you can.
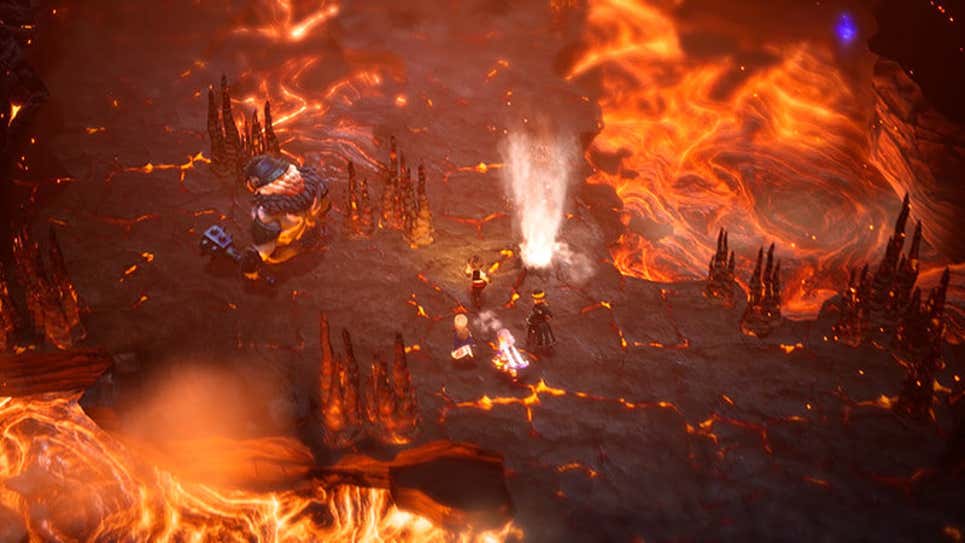
Screenshot: Square Enix
Preemptively strike enemies whenever possible.
Outside of battles, you can swing Seth’s sword by hitting the “Y” button. If you’re able to strike an enemy before a battle starts, your entire party will start with one BP rather than zero. It’s impossible to overstate how much of an advantage it is to be able to Brave from the jump without clocking negative BP.
Bangles are without question the best piece of equipment.
Each character can equip two accessories. Save one slot for whatever item will best suit your various job builds. For all four party members, you should put a bangle in the other slot. Bangles—which are available in progressively more potent tiers, like bronze, iron, mythril, and so on—grant a significant increase to your max health.
Battles in Bravely Default 2 can turn on a dime. Wherever you are in the game, the extra health boost you’d get from a bangle is often the difference between life and death. Think of it this way: If you’ve made it to the point where shops stock mythril bangles, that means you probably need mythril bangles. They’re worth the price.
Money isn’t really an issue anyway.
If you’re grinding as much as you should be—more on that in a bit—you’ll soon have enough money to buy 10,000 mythril bangles.
You can heal without potions.
All you need to do is assign one of your party members a healing-focused job, like White Mage or Red Mage. Then open up the “Magic” menu and navigate to that character. You’ll be able to cast any healing spells you’ve unlocked. Better yet, you can heal your party all at once by hitting the “Y” button—and it won’t use up any more MP than it would if you cast it on just one party member. (The tradeoff is that a group heal is marginally less potent than an individual one.) That should save you from needing to stockpile 99 X-potions.
You can also heal directly from the main menu by pressing “X,” but you won’t have any control over what spells you cast, so don’t be surprised if you wipe out all of your MP going this route.
Buy a bazillion tents.
For the price of a single potion, you can buy a tent, which will fully revitalize your entire team. It’s the most valuable single-use item you can buy. You can use them at any point in the overworld or at any save spots you find in dungeons. You’ll likely have enough MP among your party members to keep your health afloat while traversing from one save point to the next; the tent will restore the rest.
Other items you won’t regret buying in bulk:
Ethers. Sooner rather than later, you’ll start burning through MP. You can never have too many ethers.
Antidotes, Wakeup Bells, and Balsam. Poison, Sleep, and Dread are arguably the three most common status effects. They’re also (inarguably) the most debilitating. Those three items, respectively, fix all three. You’ll want a good number in your bag before venturing into any dungeon.
Magnifying Glasses. Any Freelancer can “examine” an enemy, which will allow you to see their strengths, weaknesses, and hit points. It’s invaluable information. A magnifying glass will do the same thing, so you needn’t keep a Freelancer in your party all the time. (Bonus tip: Examine one enemy once, and you won’t need to examine another enemy of that type again.)
This is probably a good time to mention that you can increase your purchase of any item by intervals of ten rather than one by flicking right on the joystick.
Pull up battle info.
You can view detailed battle info at any point by pressing the “X” button. This will show the health bars of, and reveal any info for, any enemies you’ve examined, plus any buffs and debuffs they might be afflicted with. You can also tab right or left to see the same info for your party.
There’s one big catch: The battle info display doesn’t always tell you what triggers an enemy’s counter, nor what element type they absorb. You’ll have to remember that yourself.
Adjust the battle speed.
Hitting the Plus button speeds things up. (You can kick it up to four times the normal speed, which rules for grinding.) The Minus button, meanwhile, slows it back down. I’ve found that triple-speed is a sweet spot for rank-and-file battles, while double speed is better for boss fights. They require careful strategy and measured decisions, so the comparatively slower speed is much appreciated.
Grind as you go.
It was true in last year’s demo, and it’s true today. Grinding is mandatory in Bravely Default 2, but it’s not as bad as you may think. So long as you get in the habit of fighting every enemy that crosses your path, you likely won’t find yourself in a position of needing to grind more than a level or two to get past a tough section. Good thing this game doesn’t feature random encounters!
Screenshot: Square Enix
Don’t try boss fights before you’re ready.
Most every dungeon in Bravely Default 2 follows a formula. You go through a few chambers. You hit a save point. You heal up (provided you stocked up on tents as mentioned). You go through a few more chambers. You hit another save point. And—you’ll never guess this—you venture into a boss room.
Make no mistake: The boss fights in Bravely Default 2 will ruin your day—especially if you’re not ready.
The easiest way to tell if you’re ready or not is to gauge how the cannon fodder enemies react to your presence as you move through the dungeon. Before you reach that first save point, they should run toward you. By the time you reach the final save point, you should’ve leveled up a bit, and enemies should be so intimidated by your newfound buffness that they run away from you. If they’re still beelining in your direction, sorry, but you’re probably not ready for the boss. Grind out a few levels before taking on the boss.
Don’t even think about hitting every side-quest.
If you play role-playing games, it’s almost second-nature: You see a side-quest, you do it. Enjoying your time with Bravely Default 2 will require you to banish that train of thought outright. The side-quests aren’t just boring. They’re also functionally useless.
You can identify quest-givers by chatting with the NPCs who have blue speech bubbles over their heads. More often than not, the side-quests they give you require you to find a different NPC, talk to them, return to the quest-giver, talk to them, go back to the other NPC, talk to them, and then repeat until the quest is over. Sometimes, you have to walk back and forth—this is not an exaggeration—five times (or more). You might get lucky enough to find one that has you kill, like, five goblins or collect six stalks of wheat or whatever. Sorry, but no amount of Echo Herbs will ever justify such a slog.
Still, you can be selective. If a character is putting up an item you could really use—say, an Experience Orb or a JP Orb—sure, take the quest. If it’s not something you want, or if it’s something you can easily buy at the local shop, don’t bother.
The caveat: If a party member is the quest-giver.
Every now and then, you’ll see that a party member offers a side-quest. Don’t get your hopes up for any interesting gameplay moments, but these missions can flesh out the backstories of Bravely’s main cast. (Bonus tip: No spoilers, but don’t leave Savalon before doing Adelle’s!)
Make sure your boat is always out to sea.
In the early goings of Halcyonia, the game’s first region, a very benevolent elderly woman will let you “borrow” a boat. The boat requires minimal interaction, but it’s one of the most invaluable tools at your disposal. In short, after you’ve unlocked the ship, you can visit various boat outposts and send the thing to sea, where it’ll automatically source items for you. It operates entirely in the background as you play.
When you see “maxed” over the boat icon, you know your haul is full.
Screenshot: Square Enix / Kotaku
After 12 hours, your ship will “max out,” at which point you can return to a boat outpost and claim any loot in the haul. You can then immediately send it out again—and you should, as the items generally fall into the category of “things that will level you up faster without forcing you to do any work.”
If you’re connected to the internet, you’ll be able to earn better loot. You’ll also get to see whatever creative names fellow players have bestowed upon their Seths because, for whatever reason, the connectivity element pairs you up with other players. (Most of my time with the game has been during the pre-release period, where the player base is limited. Those who have had early access tend to christen their Seths with such ingenuity as “Seth” or “S3th.”) You won’t interact with them beyond seeing these screen names.
Most major cities have a boat outpost—that elderly woman either has a bunch of clones or easy access to high-speed rail—so you needn’t worry about returning to Halcyonia. You can send your boat out or call it back in from any of the outposts you find throughout the world.
Head away from the objective marker.
Bravely Default 2’s dungeons feature a recurrent yet subtle design trick: Go off the beaten path, and you’ll likely stumble upon a chest. Keeping the objective marker on will tell you where you need to go. In that same vein, it’ll also tell you where you don’t need to go. And you’ll find some of the game’s best loot if you do, so head in that direction.
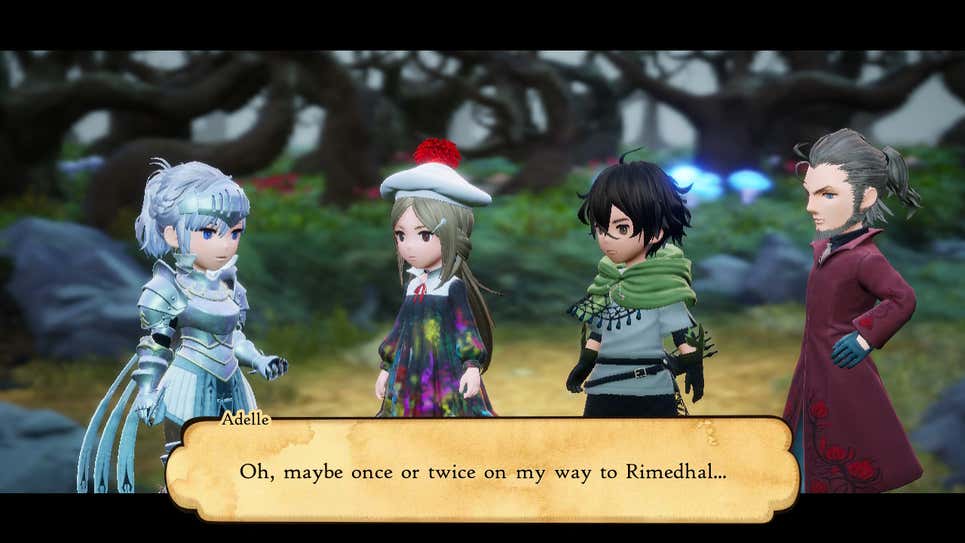
Except for in the Wayward Woods.
Take my word for it: That place suuuuucks.
Be patient.
Bravely Default 2 is a special game. Between the balance of old-school charm and modern convenience, the endlessly malleable job system and innovative turn-based battles, and the gorgeous art and wild plot twists and unmistakable social commentary, there’s something in here for everyone, truly. You might need a minute to find what you’re looking for, but you’re bound to find it eventually. So stick with it.
Unless you hate grinding.
Source: kotaku